How To Thread A Sewing Machine
To thread a sewing machine, start by lifting the presser foot and needle. Guide the thread from the spool through the thread guides and the take-up lever, then down to the needle. Thread the needle from front to back and pull the thread beneath the presser foot. Make sure to bring the bobbin thread up to the surface before beginning to sew.
Finds sewing machine manuals confusing or overwhelming. According to a survey by the British Heart Foundation, 59% of UK residents reported they are unable to sew confidently or cannot sew at all. If you’ve ever felt lost trying to make sense of a manual, this guide will walk you through how to thread a sewing machine step‑by‑step using simple, clear instructions — even if you are new to sewing.
Why Proper Threading Of a Sewing Machine Matters?
Proper threading is key to smooth and accurate sewing. Incorrect threading can lead to uneven stitches, thread breakage, tangles, or skipped stitches, and, over time, may strain or damage parts of your machine, such as the tension discs or needle mechanism.
Threading correctly ensures the upper and lower threads work together, producing neat, consistent stitches and reducing interruptions during your projects. Taking the time to thread carefully sets the foundation for professional-looking results and a stress-free sewing experience, whether you’re a beginner or an experienced sewer. If you’re new to sewing, seeing how threading fits into the bigger picture can really help. Our sewing for beginners guide covers essential skills and tools to help you build confidence as you practise.
6 Steps on How to Thread a Sewing Machine
Here are the steps for threading a sewing machine:
1. Preparing Your Machine
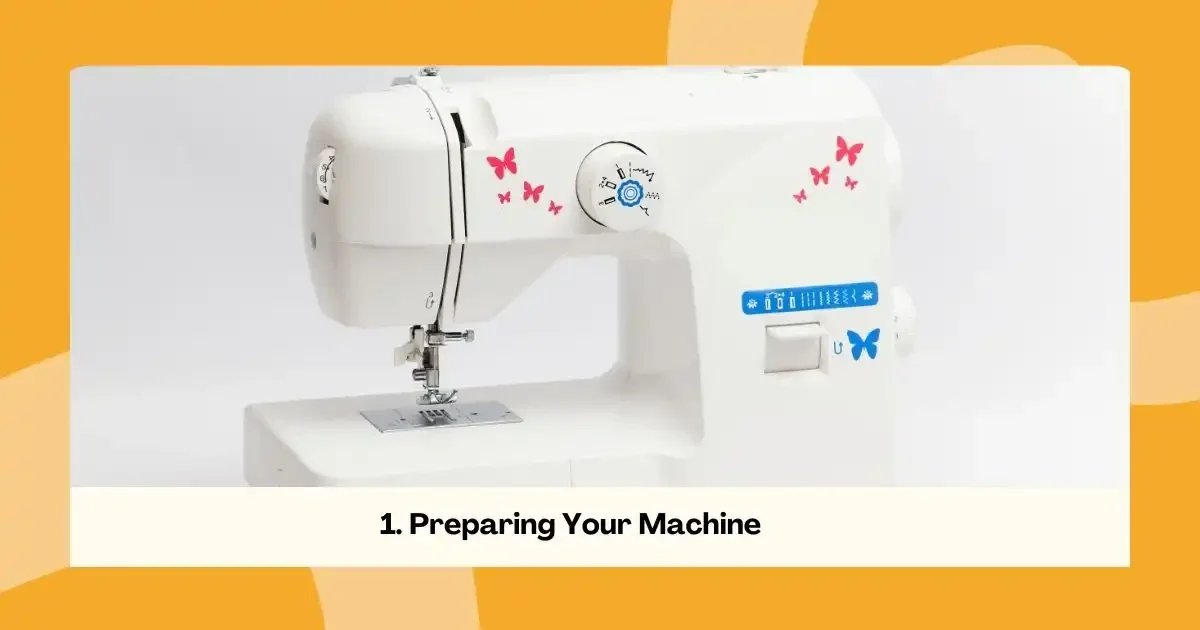
Before threading, make sure your machine is switched off. Raise the presser foot and the needle to their highest positions. This releases tension in the thread path, making it easier to thread the machine correctly. Also, ensure your machine is clean and free from dust or lint, especially around the bobbin area and tension discs.
2. Winding the Bobbin
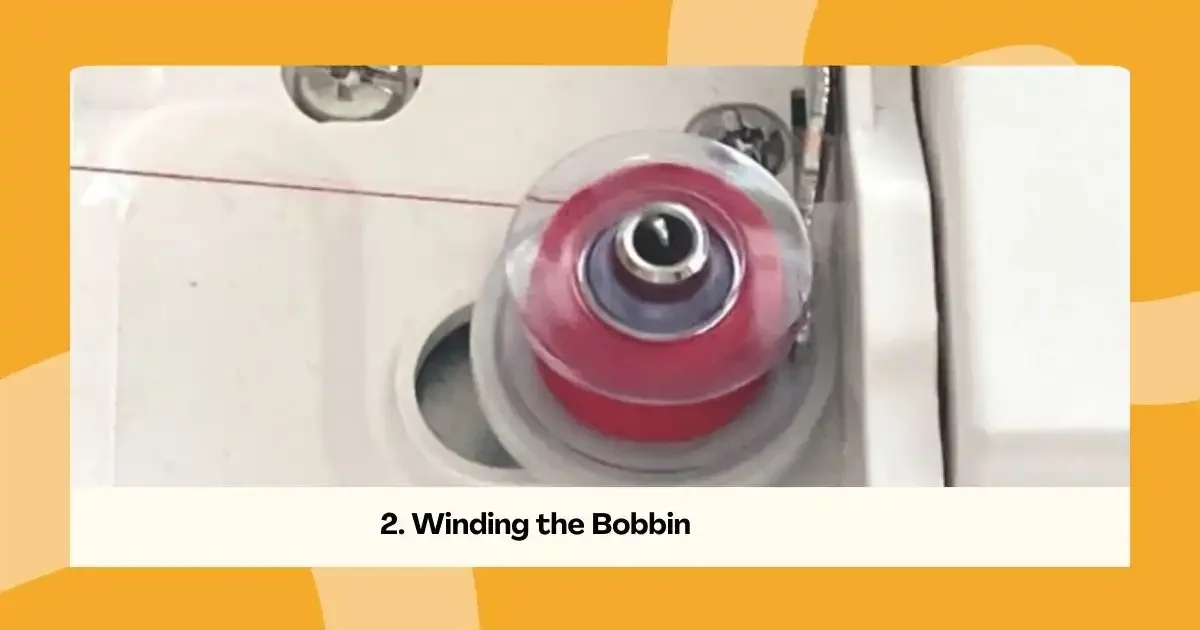
The bobbin provides the lower thread for your stitches, so it needs to be wound properly.
Place a spool of thread on the spool pin.
Pull a few centimetres of thread and wind it around the bobbin by hand to start it.
Engage the bobbin winder according to your machine’s instructions.
Start winding the bobbin until it is full, then cut the thread and remove the bobbin from the winder.
Check your machine’s manual for the correct bobbin winding direction, as some machines require clockwise or anticlockwise winding.
3. Inserting the Bobbin
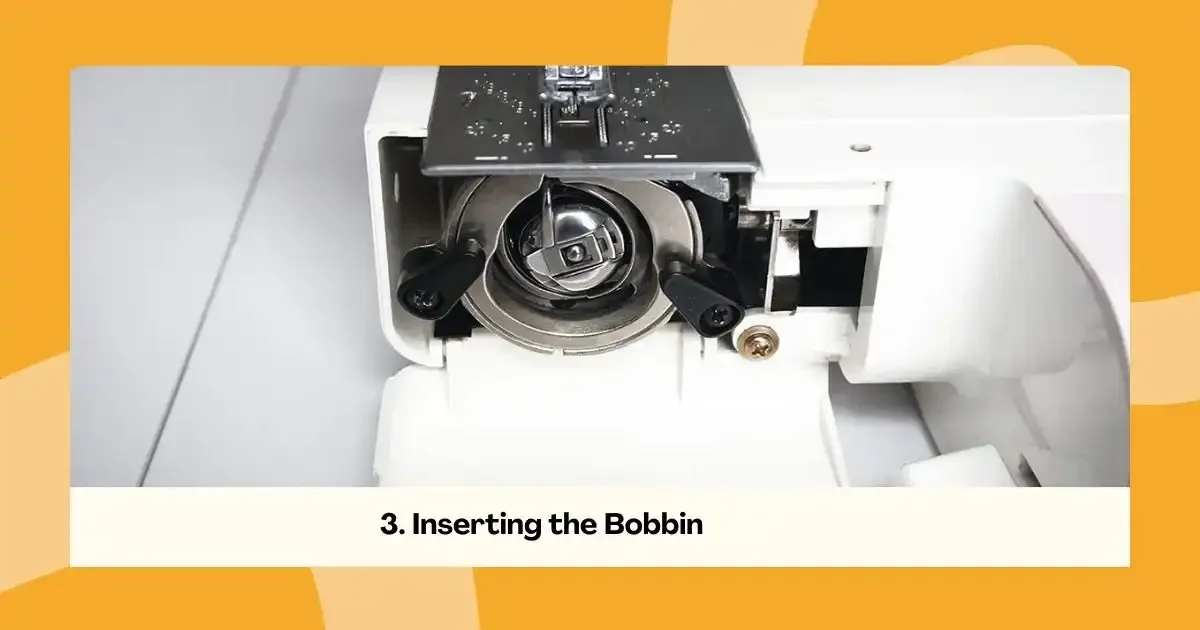
Once wound, insert the bobbin into the bobbin case. Depending on your machine, it could be top-loading or front-loading:
Top-loading: Drop the bobbin in, making sure the thread unwinds in the correct direction. Pull the thread through the slot or guide.
Front-loading: Place the bobbin in the compartment and follow the guide to thread the tension spring correctly.
After inserting, close the bobbin compartment securely.
4. Threading the Upper Thread
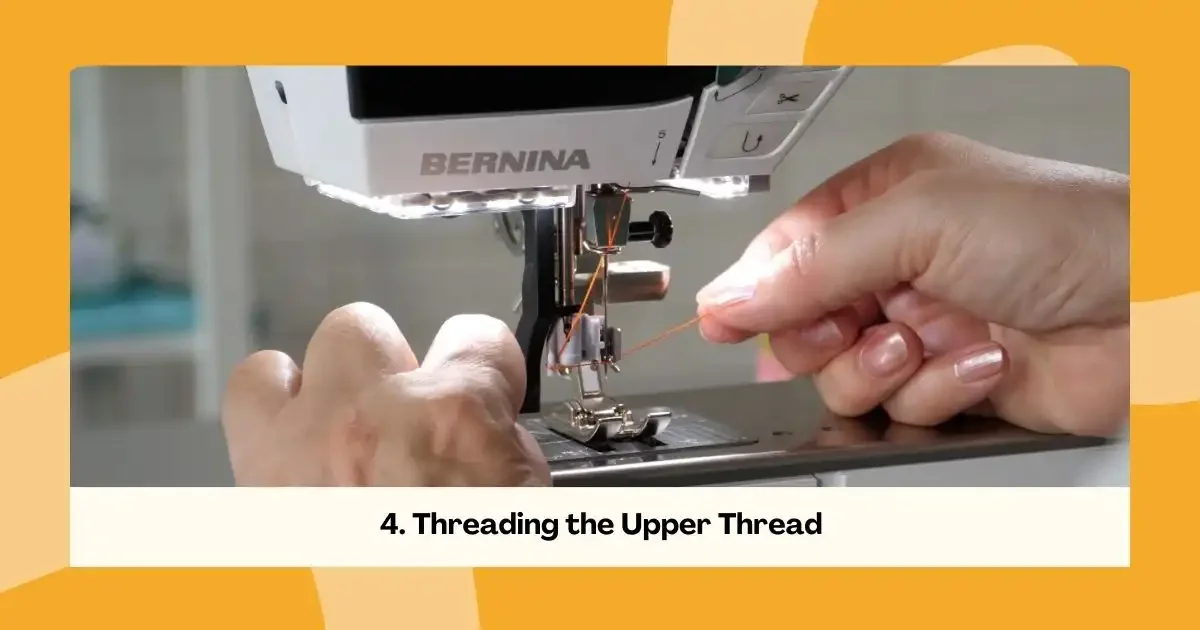
The upper thread is the visible thread on your stitches. Follow these steps for proper threading:
Lift the presser foot to release the tension discs.
Pull the thread from the spool and pass it through any thread guides marked on your machine.
Bring the thread down toward the tension discs, loop it around, and guide it back up to the take-up lever.
Thread the take-up lever from right to left (or as indicated by your machine) and guide the thread down again toward the needle.
Use the built-in needle threader if your machine has one. If not, carefully thread the needle from front to back. Pull about 10–15 cm of thread through the needle and place it under the presser foot. If your stitches don’t look quite right even after threading, adjusting the settings can make a big difference. This guide on sewing machine settings for different fabrics explains how tension, stitch length, and fabric choice all work together.
5. Drawing Up the Bobbin Thread
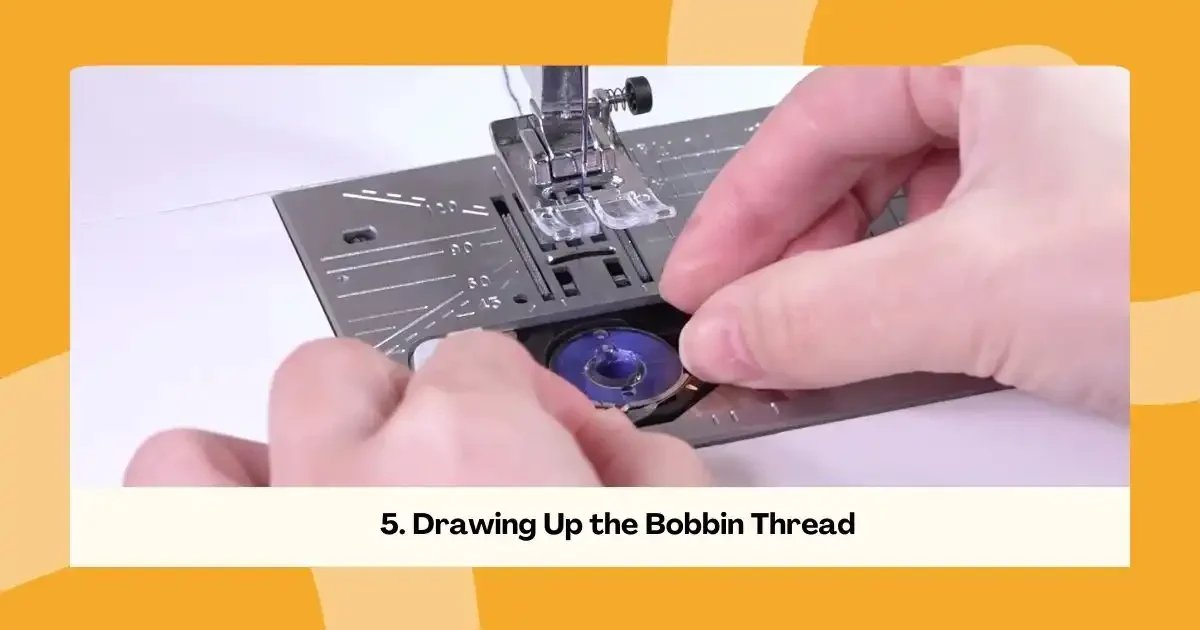
To start sewing, the bobbin thread needs to be brought up to the top:
Hold the upper thread with your left hand.
Slowly turn the handwheel toward you to lower, then raise, the needle. The needle will catch the bobbin thread and pull it up through the needle plate.
Use a small tool or your finger to pull both the upper and bobbin threads a few centimetres toward the back of the machine, under the presser foot.
This ensures both threads are ready and correctly positioned for sewing.
6. Final Checks Before Sewing
Confirm the presser foot is down before you start stitching.
Ensure the thread tension is set correctly. For most fabrics, a medium tension setting works well.
Make a few test stitches on scrap fabric to confirm the machine is threaded correctly and the tension is balanced.
Tips for Smooth Threading
Always use high-quality sewing thread to prevent breakage.
Keep your machine clean, especially around tension discs and the bobbin case.
Avoid pulling the thread too hard while sewing; let the machine feed it naturally.
Refer to your sewing machine’s manual for specific threading instructions, as machines vary slightly by model.
If you’re new to sewing, selecting beginner-friendly fabrics can prevent frustration and improve stitch quality. Our guide to the best fabric for beginner sewing offers helpful suggestions for getting started.
Common Threading Mistakes to Avoid
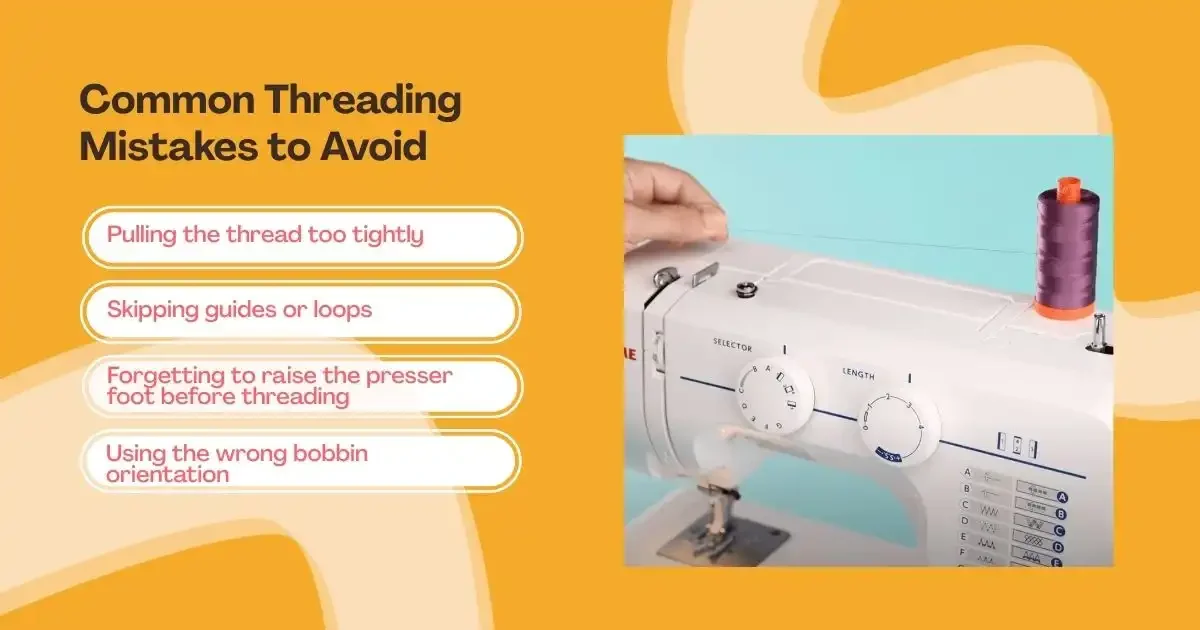
Even experienced sewers can make threading errors, which can affect stitch quality and cause frustration. Being aware of common mistakes helps prevent issues and keeps your machine running smoothly.
Pulling the thread too tightly: Tension that is too tight can cause thread breakage, uneven stitches, or fabric puckering. Always allow the thread to move freely through the guides and tension discs.
Skipping guides or loops: Each guide on your machine is designed to maintain proper thread tension. Skipping one can lead to uneven stitches, loops forming on the underside, or thread tangling.
Forgetting to raise the presser foot before threading: Raising the presser foot opens the tension discs. Threading with the foot down can trap the thread, causing skipped stitches or thread breakage.
Using the wrong bobbin orientation: Inserting the bobbin incorrectly can prevent the thread from feeding smoothly, leading to loops, uneven stitches, or the machine jamming. Always follow your machine’s instructions for the correct bobbin placement.
By avoiding these mistakes, you can ensure smooth stitching and extend the life of your sewing machine. If terms like tension discs, take-up lever, or bobbin case feel confusing, this basic sewing terms for beginners guide breaks them down in simple, easy-to-understand explanations.
Keep Learning with Expert Sewing Guidance
Learning how to thread a sewing machine is more than just a basic skill. It’s what keeps your stitches smooth and your machine running at its best. Once you understand how the parts work together, you avoid breakage, tangles and constant adjustments, making sewing far less stressful. With good threading habits, you can focus on creating projects you’re proud of instead of fixing avoidable problems.
If you’re looking for a place to build on those basics and grow your sewing skills, meet Cotton Club — a friendly and experienced sewing school offering a range of classes designed for every level. Our Sewing Courses cover everything from machine basics to more advanced techniques, giving you structured guidance every step of the way.
Frequently Asked Questions for Threading a Sewing Machine
What happens if a sewing machine isn't threaded right?
If the machine is threaded incorrectly or the thread isn’t seated properly in the tension disks, you’ll start seeing loose loops in your stitches. Industrial flatbed sewing machines use a stitch regulator to control stitch length, which typically ranges from 0 to 4mm.
How to spool thread on a sewing machine?
Place the thread spool on the spool pin and guide the thread through the tension disc. Thread the end through an empty bobbin, place it on the bobbin winder, and engage the spindle. Start winding until the bobbin is full, then remove it and trim the thread.
How do you thread a bobbin?
To thread a bobbin, place the spool on the pin, follow the guides, and wind the thread through the bobbin. For front-loading machines, insert the wound bobbin into its case with the thread running the correct way, then pull it through the slit. Insert the case, hold the top thread, and turn the handwheel towards you to bring the bobbin thread up.
How to thread a needle?
To thread a needle, start by trimming the thread’s end. You can then thread it using one of three methods: push the thread directly through the needle’s eye, use a needle threader by pulling the thread through its loop and then the needle, or try the pinch-and-fold technique. For the pinch method, fold the thread over your finger, pinch the loop, slide the needle’s eye over it, and pull the thread through.